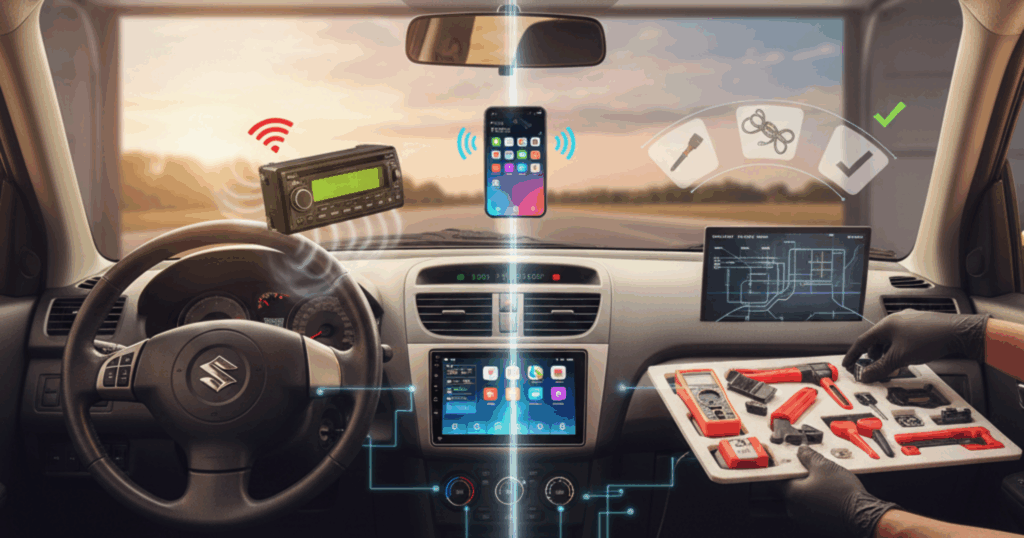
The Suzuki Swift 2nd generation (2010-2017) remains one of Pakistan’s most popular hatchbacks. Thousands are still on the road, loved for their reliability, fuel efficiency, and fun driving dynamics. However, the factory stereo system in these Swifts is painfully outdated by today’s standards—tiny screens, no smartphone integration, basic sound quality, and limited functionality. Getting your hands on the Apple CarPlay for the Suzuki Swift can completely transform your driving experience. It lets you seamlessly integrate your iPhone for navigation, hands-free calls, music streaming, and app access—all through your car’s screen.
The best part? Adding wireless CarPlay to your 2nd-gen Swift is affordable, requires minimal modifications, and is doable whether you tackle it yourself or hire a pro. This guide covers installation methods, recommended products, step-by-step instructions, costs, and common mistakes to avoid.
Understanding Your Options: Three Ways to Add Apple CarPlay
Before diving into installation steps, let’s clarify the three main approaches to adding Apple CarPlay to your Swift 2nd gen. Each has advantages and drawbacks depending on your budget, technical comfort level, and desired features.
Option 1: Replace the Factory Head Unit
Upgrade your Swift’s stereo with a modern CarPlay-compatible head unit featuring a 7–9-inch touchscreen, improved sound, and extra features like backup camera support and Bluetooth.
Pros:
- Better sound and larger screen
- Reliable CarPlay performance (wired and wireless)
- Adds features like USB charging and camera inputs
- Professional integration
Cons:
- Costs 15,000–45,000 rupees, depending on the model
- Requires some installation skill or professional help
- May need adapters and slight dashboard modifications
Option 2: Wireless CarPlay Adapter
If your Swift has a built-in screen, a wireless CarPlay adapter lets you add CarPlay without replacing the stereo.
Pros:
- Keeps your factory system intact
- Simple and affordable
- No dashboard modifications
Cons:
- May not support all CarPlay features
- Slightly less reliable than a full head-unit upgrade
Advantages:
- Maintains factory appearance
- Lower cost (12,000-25,000 rupees)
- Simplest installation—usually plug and play
- Portable between vehicles
Disadvantages:
- Only works if you already have a compatible screen-based factory unit
- Most Swift 2nd-gen base models don’t have compatible systems
- Performance depends on factory hardware quality
- Limited screen size based on the factory unit
Option 3: Use a Portable CarPlay Display
These are standalone units with built-in screens that mount on your dashboard or windshield. They connect to your phone wirelessly and essentially act as an external CarPlay display.
Advantages:
- No installation required—just mount and power
- Completely portable
- Lowest cost option (8,000-20,000 rupees)
- Can be moved between vehicles easily
Disadvantages:
- Looks aftermarket and cluttered
- Doesn’t integrate with the car’s systems
- Requires a power cable and mounting space
- Not connected to car speakers (unless you use Bluetooth)
For most Swift 2nd-gen owners, Option 1—replacing the factory head unit—provides the best balance of features, aesthetics, and value. That’s what we’ll focus on in this guide, though we’ll also touch on the other options.
What You’ll Need: Parts and Tools Checklist
Before starting your installation, gather everything you’ll need. Having all parts and tools ready prevents frustrating delays mid-installation.
Required Parts:
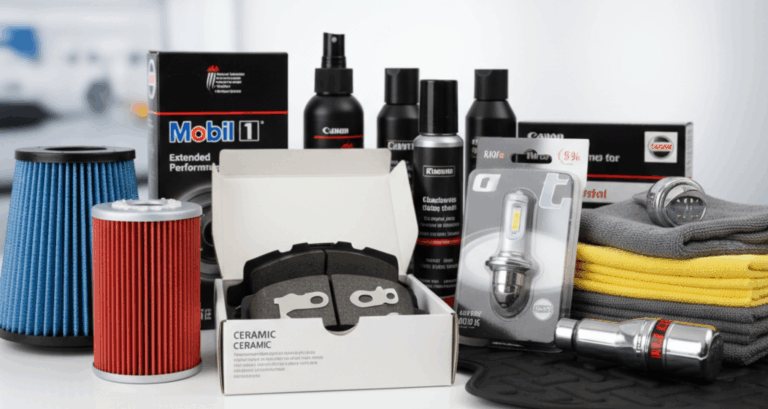
- Aftermarket Head Unit with Wireless Apple CarPlay: Budget options start at around 15,000 rupees; mid-range at 25,000-35,000 rupees; premium units at around 40,000 rupees. Popular brands available in Pakistan include Pioneer, Kenwood, Sony, JVC, and various Chinese brands through Autostore.pk’s electronics section.
- Suzuki Swift Wiring Harness Adapter: Essential for connecting the new head unit to your Swift’s electrical system without cutting factory wires. Costs 800-1,500 rupees. Make sure it’s specifically for the 2nd-generation Swift.
- Suzuki Swift Dash Kit/Fascia Panel: This plastic frame mounts an aftermarket head unit to your Swift’s dashboard opening. Costs 1,200-2,500 rupees depending on quality.
- Antenna Adapter: Connects your new head unit to the Swift’s factory radio antenna. Usually costs 300-600 rupees.
- GPS Antenna (if your head unit has navigation): Some units include this; others require a separate purchase. Around 1,000-2,000 rupees.
- Microphone (for hands-free calling): Usually included with the head unit, but verify before purchasing.
Required Tools:
- Phillips head screwdriver (various sizes)
- Flathead screwdriver (for prying trim panels)
- Panel removal tools (plastic pry tools prevent scratching—available for 300-500 rupees)
- Wire strippers (if making custom connections)
- Electrical tape
- Zip ties
- Multimeter (helpful for testing connections, though not essential)
- Trim removal tool set (makes the job much easier—around 600-1,000 rupees)
Step-by-Step Installation Process
Now let’s walk through the actual installation. This process typically takes 2-4 hours for someone with moderate DIY experience. Take your time, work carefully, and don’t rush—proper installation prevents problems down the road.
Step 1: Prepare Your Workspace and Disconnect the Battery
Park your Swift in a well-lit area, preferably indoors or in shade if it’s hot. You’ll be working inside the car, so comfortable temperature matters.
Open the hood and disconnect the negative terminal of your battery. This prevents electrical shorts while you’re working with the car’s wiring. Use a 10mm wrench to loosen the negative terminal bolt, then lift the cable off and secure it away from the battery post.
Gather all your parts and tools near the driver’s side of the vehicle. Having everything within arm’s reach makes the job flow smoothly.
Step 2: Remove the Factory Head Unit
This is the trickiest part, requiring patience and care to avoid breaking clips or scratching trim pieces.
Start by carefully prying out the trim panel surrounding the factory stereo. In the Swift 2nd gen, this panel includes the stereo, climate controls, and hazard light button. Use plastic pry tools starting from the bottom corners—wedge the tool behind the trim and gently lever it away from the dashboard. Work your way around the perimeter, releasing clips as you go. There are typically 6-8 clips holding this panel.
Don’t force anything. If a section won’t release, there’s likely a clip you haven’t disengaged yet. Look carefully and try a different angle. Forcing clips will break them, leaving you with rattling trim pieces.
Once the trim panel is loose, pull it forward gently. You’ll see wiring harnesses connected to the back—don’t yank the panel off. Reach behind and disconnect:
- The hazard light switch connector (press the tab and pull)
- The cigarette lighter/power outlet connector
- Any other electrical connections (varies by trim level)
Set the trim panel safely aside where it won’t get scratched or stepped on.
You can now access the factory head unit. It’s secured by four bolts or screws—usually 10mm bolts or Phillips-head screws — at the corners. Remove all four fasteners and keep them safe (you might reuse them depending on your dash kit design).
Pull the factory unit partially forward. You’ll see several connections on the back:
- Main power harness (largest connector)
- Antenna cable (round connector)
- Possibly auxiliary input cables or USB extensions
Disconnect all of these by pressing the release tabs and pulling straight out. Don’t twist or bend connectors excessively. Once everything is disconnected, remove the factory unit completely.
Step 3: Prepare the Wiring Harness
Your wiring harness adapter has two sides: one that plugs into your Swift’s factory wiring, and one that connects to your new aftermarket head unit. This adapter is crucial because it allows installation without cutting any factory wires—meaning you can always return to stock if needed.
Most adapters come pre-wired and ready to plug in. However, verify all connections match your specific head unit’s requirements. Sometimes minor modifications are needed.
Connect the adapter to your Swift’s factory harness (the one you just disconnected from the old stereo). It should click firmly into place. If it doesn’t fit easily, double-check you have the correct Swift-specific adapter—forcing the wrong connectors can damage them.
Now connect the wiring from your new head unit to the other side of the adapter. Match wire colors and functions:
- Red: Switched power (12V when ignition is on)
- Yellow: Constant power (12V always)
- Black: Ground
- Blue/white: Power antenna/amplifier turn-on
- Orange/white: Illumination (dims with dashboard lights)
- Various speaker wires (colors vary by manufacturer)
Most aftermarket head units include wiring diagrams. Follow these carefully. If you’re unsure about any connection, take photos at each stage so you can reference them later.
Step 4: Install the Dash Kit
Your dash kit (fascia panel) adapts the aftermarket head unit’s standardized size to fit your Swift’s dashboard opening. Quality matters here—cheap dash kits fit poorly and look terrible.
Most Swift dash kits are designed for standard DIN or double-DIN head units. Your CarPlay unit is likely double-DIN (the larger, square format common in modern stereos).
The dash kit typically comes in pieces that snap together around your new head unit:
- Secure the mounting brackets to the sides of your new head unit using the provided screws
- Snap the decorative trim pieces onto the front of the unit
- Ensure everything aligns properly before tightening screws
Step 5: Connect Accessories
Before finishing the installation, connect these accessories:
GPS Antenna: If your unit has built-in navigation, install the GPS antenna on your dashboard near the windshield for a clear sky view. Route the cable under the trim and secure it with adhesive.
Microphone: For hands-free calls, mount the microphone near the driver’s sun visor or headliner. Run the cable along the A-pillar trim and secure it with clips or adhesive.
USB Extension: If your head unit has USB ports on the back (most do), you’ll want to extend one to an accessible location. Route a USB extension cable from the back of the unit to your center console or glove box. This allows easy phone connection without cables hanging across your dashboard.
Backup Camera (if installing): Run the camera cable from the back of the head unit, along the door sills under the trim, to your rear bumper. The camera mounts near the license plate. This requires removing several trim pieces and carefully routing the cable—it’s time-consuming but worth the safety benefit. Connect the camera’s power to your reverse light circuit so it automatically activates when you shift into reverse.
Step 6: Test Everything Before Final Assembly
This is crucial: test all functionality before putting everything back together. Reconnect the negative terminal of your battery temporarily.
Turn on your car’s ignition (don’t start the engine—turn the key to accessory mode). Your new head unit should power up. Check:
- Does the screen turn on?
- Does it display the CarPlay interface?
- Can you pair your iPhone via Bluetooth?
- Does wireless CarPlay connect automatically?
- Do all speakers produce sound?
- Does the touch screen respond properly?
- If you installed a backup camera, does it activate when you shift to reverse?
Step 7: Final Installation and Reassembly
With everything tested and working, carefully push the new head unit (with the dash kit attached) back into the dashboard opening. Guide the wiring harness through without pinching any wires. The unit should slide into place smoothly and sit flush with the dashboard.
Secure the head unit using the bolts or screws that attach through the dash kit. Don’t overtighten—you’re screwing into plastic, which can strip easily. Snug is sufficient.
Reconnect all the trim panel electrical connections you disconnected earlier (hazard switch, power outlet, etc.). Make sure each connector clicks firmly into place.
Do a final check of all gaps and alignment. Everything should look factory and integrated, not obviously aftermarket.
Step 8: Final Testing and Configuration
- Turn on the head unit and wait for it to boot up fully
- Enable Bluetooth and WiFi on your iPhone
- The head unit should appear in your iPhone’s Bluetooth settings—pair them
- Once paired, CarPlay should automatically launch on the head unit’s screen
- Configure CarPlay settings on your iPhone (Settings > General > CarPlay)
- Test navigation, music, calls, and any other features you’ll use regularly
- Adjust audio settings on the head unit for optimal sound quality
- Set the clock, display brightness, and other preferences
Take a test drive around your neighborhood. Make sure everything works while driving—sometimes issues only appear with vehicle vibration or when components heat up.
If everything works perfectly, congratulations! You’ve successfully retrofitted wireless Apple CarPlay to the Suzuki Swift.
FAQs: Apple CarPlay Suzuki Swift
Q: I have a 2012 Suzuki Swift DLX. The dashboard seems slightly different from the installation videos I’ve seen for 2014+ models. Will the same head unit and dash kit work, or do I need different parts? Also, I’m worried about losing my steering-wheel audio controls—will they still work after installation?
The Swift 2nd generation (2010-2017) did have minor dashboard variations between early and late models, particularly in trim panel design and the stereo surround area. However, the actual stereo mounting dimensions and wiring remained consistent across generations, which is good news for you. Your 2012 DLX will accept the same aftermarket head units and use the same basic wiring harness adapter as 2014+ models. The main difference you’ll encounter is with the dash kit—some dash kits are specifically designed for pre-2013 vs post-2013 models because the trim panel shape changed slightly.
Q: I’m considering the cheaper portable CarPlay display that mounts on the dashboard instead of replacing my whole stereo system. My mechanic says this is a better option because it’s easier to remove if I ever sell my Swift, plus it’s less than half the cost. Is there a real difference in functionality, or is the installed head unit mainly just about looks?
Your mechanic is right—portable CarPlay displays are easy to install and remove since they’re plug-and-play and require no dashboard modification. However, if this Swift is your main vehicle for years to come, it’s worth considering a permanent head unit for better functionality.
Portable units connect via Bluetooth, which compresses audio and introduces slight delays, sometimes leading to issues such as overlapping navigation prompts. Installed head units deliver superior sound quality with direct speaker connections and no lag. They also integrate seamlessly, powering on when the car starts, turning off automatically, and working with steering wheel controls (with the right adapter). This creates a smoother, more cohesive experience.
Q: I installed a Chinese CarPlay head unit in my 2014 Swift GLX three months ago. Everything worked fine initially, but lately the wireless CarPlay connection has become really unreliable—sometimes it connects instantly, other times it takes 5+ minutes or doesn’t connect at all. Also, during very hot days, the screen occasionally freezes or restarts randomly. My installer says this is normal and I need to be patient with the connection. Is this really normal, or did I get a defective unit? What can I do to improve reliability?
Experiencing issues such as freezing, restarting, or unreliable wireless CarPlay on budget Chinese head units is common, but it’s neither normal nor acceptable. These problems often stem from low-quality WiFi and Bluetooth components. Here’s how to improve it:
- Update the head unit’s firmware—check the manufacturer’s website or contact the seller for updates.
- Update your iPhone to the latest iOS for improved CarPlay compatibility.
- Forget the CarPlay connection on both your phone and the head unit, then re-pair them, as corrupted profiles can cause issues.
Quality head units from reputable brands don’t typically have these problems.
Final Thoughts
Adding Apple CarPlay to the Suzuki Swift is a great way to improve sound quality, especially if your Swift still has factory speakers. The 2nd-gen Swift’s audio system was never impressive—thin door speakers, no subwoofer and basic amplification.
Your new head unit likely has better audio processing than the factory unit, but it can only work with what the speakers deliver. Consider these upgrades: