Your car seats take more abuse than almost any other part of your vehicle. Think about it. Every time you get in, you’re bringing dust, sweat, and whatever else you picked up during the day. Kids spill juice boxes. Someone drops oily samosas. Monsoon season leaves you tracking mud everywhere. Before you know it, your seats look rough and smell worse. In ideal situations, you need to deep-clean car seats as soon as you notice they’re getting dirty!
Most people in Pakistan ignore their seats until things get really bad. Then they either live with the mess or pay a detailer three to five thousand rupees for a professional clean. But here’s what nobody tells you. You can get professional-level results at home with basic supplies and a couple hours of work.
Whether you’ve got fabric seats, leather, or that vinyl stuff that came with your budget hatchback, this guide to deep-cleaning car seats covers it all.
Why Your Car Seats Need More Than Surface Cleaning
Most car owners think cleaning means vacuuming and maybe hitting things with some water. That gets surface dirt, sure. But it does nothing for what’s actually making your seats look bad and smell worse.
Dirt, oil, sweat, and bacteria dig deep into your seats over time. Fabric is the worst because all those fibers trap everything down where you can’t see it. That funky smell in your car isn’t because your air freshener quit working. It’s months’ worth of nasty stuff buried in the seat material.
Leather and vinyl look easier to maintain since they’re smooth, but body oils break down their protective layers. Eventually, cracks show up, and the material gets stiff and beat-up-looking, even on newer cars. Just wiping the surface doesn’t help much. You’re basically pushing dirt from one spot to another instead of getting it out.
Deep cleaning pulls out this embedded dirt. It restores the look and feel of your seats. More importantly, it makes your car a healthier place to spend time. If you’ve got kids or anyone with allergies, this matters more than you think.
What You Actually Need
You don’t need expensive equipment or hard-to-find chemicals. Most of this stuff is available at Autostore.pk or any decent car accessories shop across Pakistan.
For Fabric Seats
You’ll need a good upholstery cleaner. Chemical Guys or Turtle Wax both make solid products that work in Pakistani conditions. Skip the cheap local brands that promise miracles. They’re mostly water and fragrance.
Get yourself a stiff brush with nylon or plastic bristles. Not wire, that’ll damage your fabric. A basic scrub brush from any hardware store works fine. Some people prefer detailing gentler brushes, but a regular brush does the job if you’re careful.
Microfiber towels are essential. Buy at least four or five good ones. The cheap terry cloth towels people use for washing dishes won’t cut it. Microfiber actually absorbs water and dirt rather than just pushing them around.
A vacuum with decent suction helps a lot. Suppose you’ve got a wet/dry shop vac, even better. Those can suck up the dirty water after you’ve cleaned, which considerably speeds up drying time.
For tough stains, keep some white vinegar and baking soda around. These aren’t just kitchen ingredients. They’re legitimate cleaning agents that work on organic stains and odors.
For Leather Seats
Leather needs different products. You want a dedicated leather cleaner, not all-purpose stuff. Meguiar’s and Armor All both make versions that won’t damage the material. Leather in Pakistani cars already takes a beating from heat.
Get a soft brush or a microfiber applicator pad. Leather is more delicate than fabric. You’re cleaning, not scrubbing paint off a wall.
Leather conditioner is just as important as the cleaner. Cleaning removes dirt but also strips away some of the leather’s natural oils. Conditioner puts that moisture back and prevents cracking. This step isn’t optional in Pakistan’s climate.
For Vinyl Seats
Vinyl is the easiest to clean but also the most easily damaged. Any good all-purpose cleaner works, but make sure it’s not too aggressive. APC (all-purpose cleaner), properly diluted, does fine.
You’ll want a soft brush and microfiber towels. Vinyl protectant is worth having to prevent fading and cracking from sun exposure. Pakistan’s UV levels destroy vinyl faster than most materials.
General Supplies Everyone Needs
A spray bottle makes life easier. Mix your cleaning solution in there for even application.
Old toothbrushes work great for getting into seams and tight spots where regular brushes won’t fit.
A bucket of clean water for rinsing tools and towels as you work keeps you from spreading dirt around.
Gloves aren’t mandatory, but they protect your hands from drying out from chemicals, especially if you’re working on multiple cars or have sensitive skin.
Deep Cleaning Fabric Seats Step by Step
Fabric seats are the most common in Pakistani cars and also the most forgiving when you’re learning to clean properly. Here’s how to do it right.
Step One: Remove Everything and Vacuum Hard
Pull everything out first. Floor mats, seat covers if you’ve got them, whatever’s shoved under the seats. You need clear access to work properly. Vacuum hard before any liquid touches anything. Get that crevice tool into the seams and the crack between the seat bottom and back.
The amount of dirt packed in there will surprise you. Give each seat at least five minutes. Rush this part, and you’ll just make mud when the cleaner hits dry dirt. Focus extra on where people actually sit. The driver’s seat always has the worst buildup. Passenger seats look better, but they’re still dirty and need the same work.
Step Two: Pre-Treat Stains
Got visible stains? Deal with them before the general cleaning. Different stains need different approaches.
For food and drink stains, spray your upholstery cleaner directly on the spot. Let it sit for two or three minutes to break down the stain. Don’t let it dry out, but give it time to work.
Grease stains from oily food need something stronger. Mix a solution of dish soap and warm water. The soap cuts through oil better than most car-specific cleaners. Apply it, let it sit, then blot with a clean towel.
Blood stains (don’t ask) need cold water, never hot. Hot water sets blood permanently. Dab cold water on it, blot, repeat. If it’s old, hydrogen peroxide works, but test it on a hidden spot first since it can bleach some fabrics.
Step Three: Apply Cleaner to Entire Seat
Start from the top and work down. Gravity is your friend here. You don’t want dirty cleaner running down onto areas you’ve already cleaned.
Use your brush to agitate the cleaner into the fabric. Scrub in circular motions with moderate pressure. You’re trying to loosen dirt trapped in the fibers, not wear a hole through the seat.
The cleaner will start foaming up as you scrub. That foam is pulling dirt out of the fabric. Keep working until you’ve covered the entire seat surface, including the sides and back.
Step Four: Extract the Dirty Cleaner
This is where most DIY cleaning jobs fail. People scrub in cleaner but don’t properly remove it. The dirt just redistributes, and the seats stay grimy.
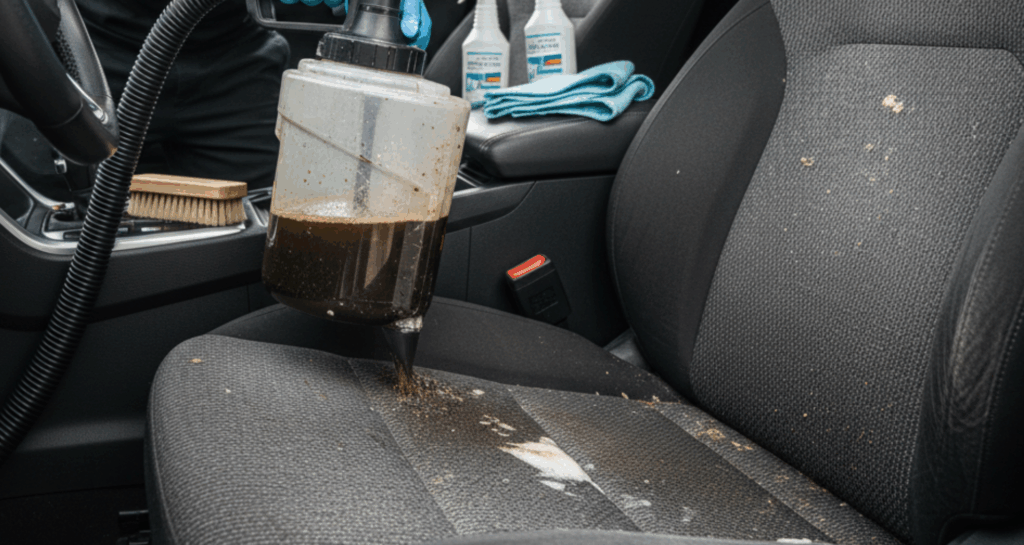
If you have a wet/dry vacuum, now’s the time to use it. Go over the entire seat, sucking up the dirty foam and liquid. You’ll see the water you pull out is disgusting. That’s all the grime that was living in your seats.
No wet/dry vac? Use clean microfiber towels to blot up the moisture. Press firmly and hold for a few seconds to draw liquid into the towel. Keep using fresh towels as they get saturated. This takes longer but works almost as well as extraction.
Flip the towels to a dry side frequently. A wet towel just moves dirty water around instead of removing it.
Step Five: Rinse If Needed
Some upholstery cleaners need rinsing; others don’t. Check the product instructions. If rinsing is recommended, spray clean water lightly on the seats and extract again with your vacuum or towels.
Skipping this step when it’s needed leaves soap residue behind. That residue attracts dirt more quickly, meaning your seats get dirty again faster.
Step Six: Dry Completely
This is critical in Pakistan’s humid climate, especially during monsoon season. Damp seats grow mold and mildew fast.
In winter or humid weather, drying can take 12 to 24 hours. Don’t rush it. Using the car before seats are fully dry just compresses damp fabric and undoes all your cleaning work.
If you need to speed things up, run the car with the heater on full blast and the windows slightly cracked. The heat helps evaporate moisture faster.
Deep Cleaning Leather Seats Step by Step
Step One: Vacuum and Prep
Just like with fabric, start by vacuuming. Leather seats have seams and perforations that collect dirt. The vacuum crevice tool gets into these spots effectively.
Check for any damage before cleaning. Tears or worn spots might get worse with liquid cleaners. If you find damage, address it after cleaning or consider leaving those spots dry.
Step Two: Apply Leather Cleaner
Spray leather cleaner onto a microfiber cloth or soft brush, not directly onto the seat. This gives you better control and prevents over-saturating the leather.
Work in small sections, maybe one seat panel at a time. Gently rub the cleaner in using circular motions.
The cleaner will start lifting dirt and oils from the leather surface. You’ll see the cloth getting dirty, which is exactly what you want.
Pay extra attention to the seat bolsters where you slide in and out. These areas get the most contact and collect the most body oils. The steering wheel contact points also get extra grimy.
Step Three: Wipe Clean
Use a separate clean, damp microfiber towel to wipe away the dirty cleaner. Don’t let cleaner sit on leather for extended periods. It can dry out the material.
Wring out your damp towel well. You want it barely wet, not dripping. Leather doesn’t handle excess moisture well.
Go over each section multiple times until the towel comes away clean. If you’re still picking up dirt, repeat the cleaning step before moving on.
Step Four: Dry and Inspect
Leather dries faster than fabric but still needs time. Leave doors open for air circulation. Don’t sit on the seats until they’re completely dry.
Once dry, inspect your work in good light. Missed spots will be obvious now. You can spot-clean anything you notice without having to redo the whole job.
Step Five: Condition the Leather
This step separates okay results from great ones. Leather conditioner replaces the oils you removed during cleaning and protects against future damage.
Apply a small amount of conditioner to a microfiber applicator or cloth. A little goes a long way. Too much just sits on the surface and feels greasy.
Rub the conditioner into the leather using circular motions. Work it into the material, not just across the surface. The leather should absorb the conditioner.
Let it sit for 15 to 20 minutes, then buff away any excess with a clean, dry microfiber towel. The leather should feel supple, not sticky or greasy.
Conditioning every three to four months keeps leather looking good and prevents cracking, which is so common in Pakistani cars.
Deep Cleaning Vinyl Seats Step by Step
Vinyl is common in budget cars and commercial vehicles. It’s tough and easy to clean, but it needs regular attention to avoid looking cheap and worn.
Step One: Vacuum and Remove Loose Dirt
Same starting point as always. Vacuum thoroughly to remove loose dirt and debris. Vinyl seats often have texture or grain that traps dirt in the grooves.
Step Two: Apply Cleaner
Use an all-purpose cleaner diluted according to directions. Spray it on the seat or apply with a damp cloth. Vinyl can handle more moisture than leather, but don’t go crazy.
Let the cleaner sit for a minute or two to break down grime, especially on heavily soiled areas.
Step Three: Scrub and Wipe
Use a soft brush to scrub the vinyl. The texture and grain need agitation to release trapped dirt. Brush in the direction of the grain if your vinyl has a pattern.
Wipe away the dirty cleaner with microfiber towels. Rinse your towels frequently and use clean ones as needed.
For stubborn spots, repeat the process. Vinyl is forgiving, so you can scrub harder than you would with leather.
Step Four: Dry and Protect
Wipe the seats dry with clean towels. Vinyl dries fast, but don’t skip this step.
Apply a vinyl protectant to prevent fading and cracking from sun exposure. Pakistan’s UV levels destroy vinyl faster than most materials. A protectant also makes future cleaning easier, since dirt doesn’t stick as well to treated surfaces.
Buff the protectant in with a microfiber cloth. The seats should have a slight sheen but not look wet or greasy.
Dealing With Specific Problems
Beyond general cleaning, some issues need special attention. Here’s how to handle the most common problems in Pakistani cars.
Cigarette Smoke Smell
If someone’s been smoking in your car, the smell gets into everything, especially fabric seats. Regular cleaning helps but might not eliminate it.
After your normal deep clean, spray a mixture of equal parts white vinegar and water on the seats. Let it dry completely. The vinegar smell fades as it dries, taking smoke odor with it.
Baking soda is your other weapon. Sprinkle it liberally on dry seats, work it in slightly with a brush, and leave it overnight—vacuum thoroughly the next day. Baking soda absorbs odors at a molecular level.
For serious smoke smell, you might need to repeat both treatments several times.
Mold and Mildew
This happens when seats stay damp for too long, which is common during the monsoon season or if you’ve got a water leak somewhere.
Mix one part white vinegar with four parts water, then spray it on the affected areas. Vinegar kills mold and mildew effectively. Scrub with a brush, then extract the liquid.
For fabric seats, follow up with your regular upholstery cleaner to remove any remaining spores and vinegar smell.
Make sure to identify and fix whatever caused the moisture problem in the first place. Otherwise, the mold just comes back.
Pet Hair
If you’re transporting pets, hair gets everywhere and sticks to fabric like it’s glued on. Regular vacuuming often doesn’t cut it.
Before vacuuming, put on a rubber glove, dampen it slightly, and rub it across the seat fabric. The rubber creates static that pulls hair into clumps you can easily grab.
You can also use a squeegee or a pumice stone designed for removing pet hair. Stroke across the fabric in one direction. The hair bunches up and lifts away.
After removing most of the hair this way, vacuum to get what’s left.
Ink Stains
Pen explosions happen, especially if you keep pens in your center console in summer heat.
Dab, don’t rub, to avoid spreading the ink. Keep using fresh cotton as it picks up ink.
For leather, use rubbing alcohol very carefully and condition immediately after. Alcohol can dry out leather fast.
Hairspray used to be a popular remedy, but modern formulas don’t work as well as they did. Stick with rubbing alcohol.
Grease and Oil
Whether it’s from food or actual automotive fluids, grease needs special treatment.
Dish soap is designed to cut grease and works better than most car-specific products for this. Mix a small amount with warm water, apply to the stain, work it in with a brush, and blot dry.
For old, set grease stains, try covering the spot with cornstarch or baking soda. Let it sit for several hours or overnight to absorb the oil, then vacuum and clean normally.
WD-40 actually removes grease stains, too, though it may sound counterintuitive. Spray a tiny amount on the stain, let it sit briefly, then clean with your regular upholstery cleaner. Test this on a hidden spot first.
Mistakes That Ruin Your Seats
Using Too Much Water
This is the number one killer of DIY seat cleaning. More water doesn’t mean cleaner seats. It means longer drying times and potential mold growth.
Whether you’re cleaning fabric, leather, or vinyl, use the minimum amount of liquid needed. Damp is good, soaking is bad.
Skipping the Vacuum Step
Trying to deep clean without vacuuming first just turns dry dirt into mud. You’re making more mess, not less.
Always, always vacuum thoroughly before any liquid touches your seats.
Using Harsh Chemicals
Bleach, strong solvents, and aggressive household cleaners can permanently damage seat materials, especially leather and vinyl.
Stick with products designed for automotive use. They’re formulated for the materials in your car and won’t cause unexpected damage.
Not Testing Products First
Different cars use different materials and dyes. What works fine in one car might discolor or damage seats in another.
Before using any new cleaner or technique, test it on a hidden spot first. Under the seat or on the backrest where it touches the rear bench works well. Wait 24 hours to see if there’s any discoloration or damage.
Forgetting About Seat Belts
Seat belts run through and across your seats, collecting just as much grime. Cleaning the seats while leaving dirty belts makes no sense.
Pull the belts out fully and clean them with the same products you’re using on fabric seats. Let them dry completely before retracting.
Sitting on Damp Seats
You spent all this time cleaning, only to immediately compress the damp fabric or leather by sitting on it. Now it won’t dry properly, and you’ve pressed any remaining dirt deeper into the material.
Let the seats dry completely before using the car. Plan your deep cleaning for a day when you don’t need the vehicle.
Maintaining Clean Seats Between Deep Cleans
Deep cleaning two or three times a year keeps your seats in good shape, but maintenance between those sessions makes a huge difference.
Regular vacuuming should happen weekly if you drive daily. This takes five minutes and prevents dirt from working its way deep into the material.
Spot-clean spills immediately. A fresh stain wipes away in seconds. That same stain left for a week becomes a permanent mark.
Use seat covers if you’re transporting messy stuff or people. A cheap seat cover protects your investment and can be thrown in the washing machine.
Keep a pack of interior detailing wipes in your car. A quick wipe-down of high-contact areas weekly stops body oils from building up.
For leather seats, a light application of conditioner every month or two helps prevent drying and cracking before they start.
Don’t eat in your car if you can avoid it. This is the hardest rule to follow, but it’s also the most effective at preventing stains and odors.
Products Worth Buying From Autostore
Since you’re reading this on Autostore.pk, here are specific products to consider for your seat-cleaning kit.
Chemical Guys makes several upholstery cleaners that work well in Pakistani conditions. Their Lightning Fast formula cuts through grime quickly and leaves little residue.
Turtle Wax upholstery cleaner is more budget-friendly and still delivers solid results. It’s widely available and works fine for regular maintenance cleaning.
For leather, Meguiar’s Gold Class Rich Leather Cleaner and Conditioner are both excellent. The cleaner removes dirt without drying, and the conditioner keeps leather supple even in harsh heat.
Armor All also makes good leather products at a lower price point. Their Leather Care Gel works well for quick maintenance.
Microfiber towels from any decent brand beat the cheap alternatives. Buy quality ones once, rather than constantly replacing cheap towels.
A good detail brush set gives you options for different surfaces and tight spots. Chemical Guys and Mothers both make brush sets that cover most cleaning needs.
For serious stains, keep Turtle Wax Odor-X spray around. It’s enzymatic, meaning it actually breaks down organic stains and odors instead of just covering them up.
When to Call a Professional
DIY deep cleaning handles most situations, but sometimes professional help makes sense.
If you’ve got extensive mold growth throughout the interior, a professional has equipment and products that work faster and more thoroughly than household methods.
Serious water damage from flooding needs professional attention. Your seats are probably the least of your problems in that case, and pros can assess whether anything needs to be replaced.
Vintage or exotic leather in high-end cars deserves professional care. The material might be more delicate or require special products you don’t want to experiment with.
If your first attempt at DIY cleaning makes things worse, stop and call someone who knows what they’re doing. Trying to fix your fixes often creates more damage.
Commercial vehicles like taxis and delivery vans might need professional equipment for the volume of cleaning required. The time investment for DIY doesn’t make sense when you need the vehicle back in service quickly.
FAQs: Deep Clean Car Seats
How long does it take for car seats to dry completely after deep cleaning in Pakistan’s climate?
Drying time depends heavily on humidity and temperature.
In dry summer weather with good air circulation, fabric seats take about 8 to 12 hours to dry completely. During monsoon season or in humid coastal areas like Karachi, it can last 24 hours or more.
Leather and vinyl dry much faster, usually 2 to 4 hours regardless of conditions. Speed things up by parking in a breezy spot with all doors open, or by running your car’s heater with the windows slightly cracked. Never use the seats until they’re bone dry. Sitting on damp seats compresses moisture back into the foam underneath, where it takes forever to evaporate and can cause mold.
Can I use regular household cleaners instead of automotive products for my car seats?
You can use some household products successfully, but others will permanently damage your seats. White vinegar, baking soda, and basic dish soap are safe and effective for most seat cleaning tasks. They’re actually better than many cheap automotive products.
Stay away from bleach, ammonia cleaners, and anything with harsh solvents. They’ll discolor your fabric, wreck the protective layer on leather, and turn vinyl stiff and cracked. Kitchen degreasers look like a good idea for tough stains, but they’re way too strong for car seats. Proper automotive cleaners are formulated for the exact materials in your interior and won’t trash them, plus they rinse out more easily.
That simple combo handles probably 80% of what you’ll run into. Cut corners on the cleaner if you have to, but buy decent microfiber towels. Good towels matter way more than fancy chemicals when it comes to actual results.
What’s the best way to remove extremely stubborn stains that won’t come out with normal cleaning?
Really tough stains need special handling.
Got blood, food, or any organic mess? Grab an enzyme cleaner like Turtle Wax Odor-X, spray it on thick, wait 10 minutes, then scrub it out.
Old grease marks respond better to a baking soda and dish soap paste left overnight to soak up the oil, then vacuum it off. Ink stains need rubbing alcohol on cotton balls; just keep dabbing until it lifts. Mystery stains where you don’t even know what happened?
Hit them with hot water and scrub hard with a stiff brush. Honestly though, some stains go so deep they’re never coming out.
Final Thoughts on Seat Cleaning
Your car seats don’t need to look and smell disgusting.
The key is being thorough at each step instead of rushing through. Vacuum properly, use the right products for your seat material, extract dirty cleaner completely, and let everything dry fully.
Most seat damage and permanent staining comes from neglect, not use. Regular maintenance between deep cleans prevents problems from developing in the first place.
Start with one seat to learn the process before tackling the whole car. You’ll get faster and better with practice.
Ready to get started? Head over to Autostore.pk for all the cleaning products, brushes, and microfiber towels you need. Your seats have suffered enough.